How to set up lvmcache across LUKS-encrypted partitions
In this tutorial, I’ll set up an lvmcache across LUKS-encrypted partitions in a Debian-based system.
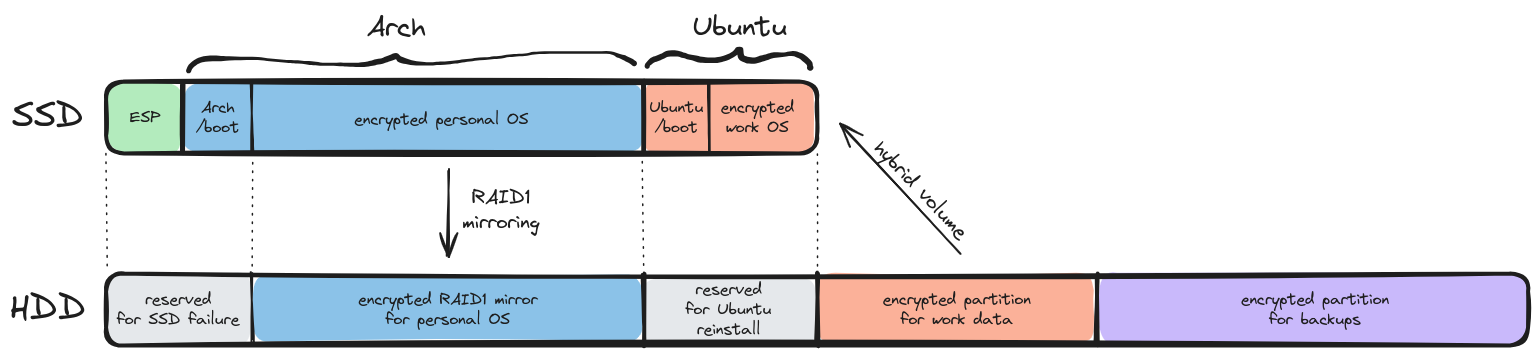
This was the solution I chose to increase the performance of hybrid storage - in which part of the SSD acts as a cache to the HDD - in a fully-encrypted setup.
Starting from a fresh Ubuntu 24.04 LTS encrypted install, we’ll:
- Shrink the root volume in order to free disk space in the primary disk (SSD)
- Create an encrypted partition in the secondary disk (HDD)
- Configure a volume in the SSD as a cache for the HDD volume
- Set up initramfs hooks to mount everything on boot, with a single decryption password
0. Prepare operating environment
While I’m sure some of the operations we’re about to perform could be applied to a live system, I prefer to do these things from a live USB. I’ll use an Arch Linux ISO for this, since it is lightweight and includes all the tools we need.
1. Reduce root SSD volume
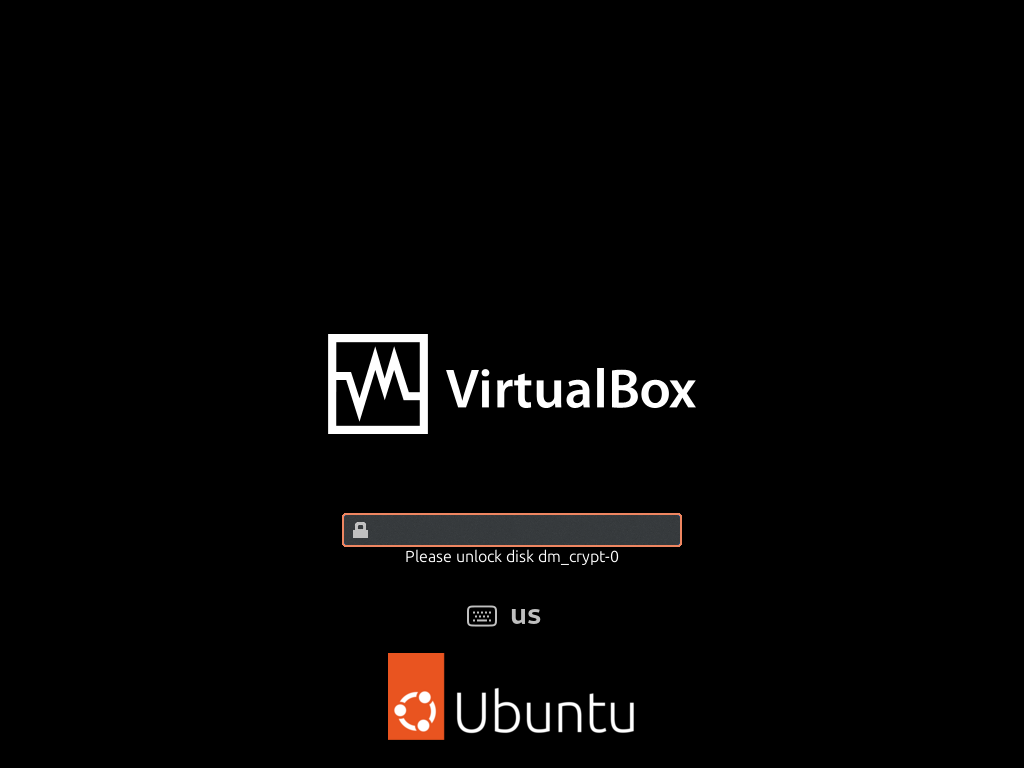
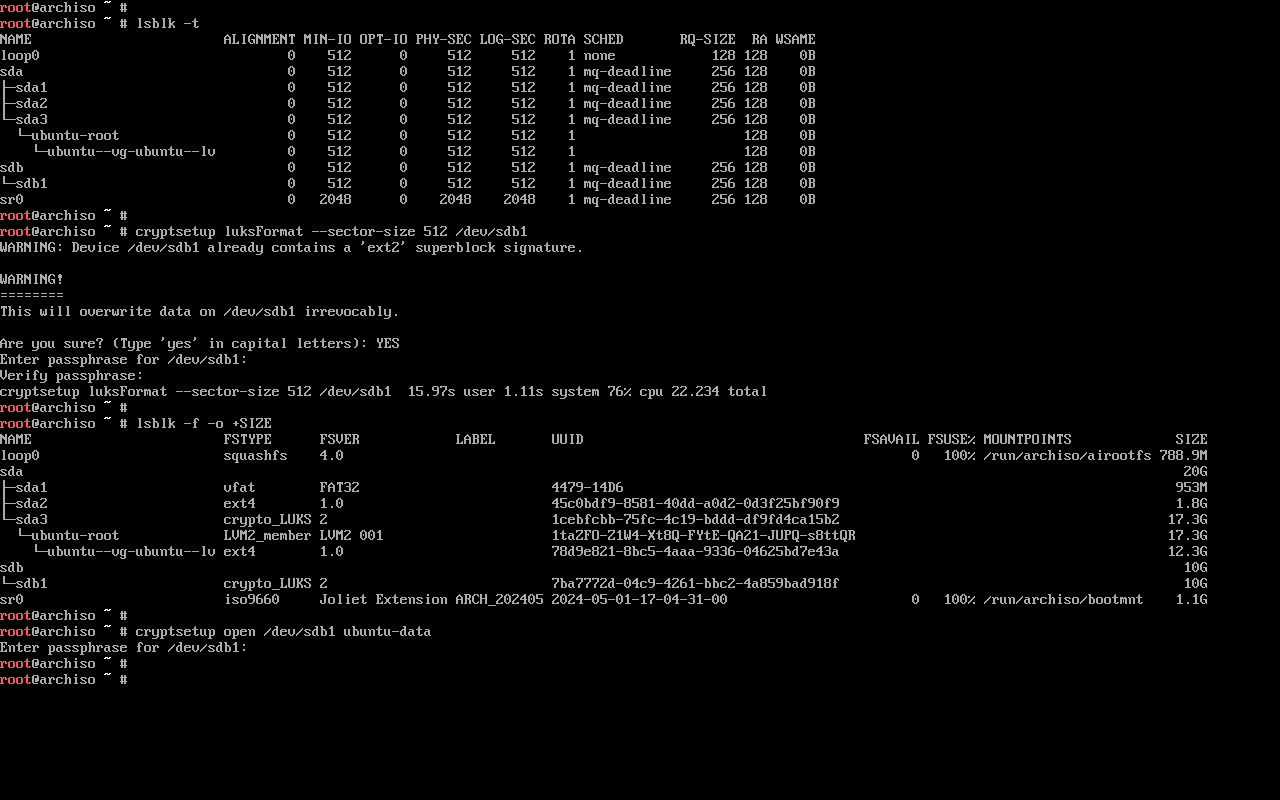
After flashing the ISO to a USB and booting into it, we start by decrypting the Ubuntu LUKS partition (/dev/sda3 in this case).
Then, we can resize the filesystem and reduce the logical volume in one go (in this case, freeing up 5GiB in the primary LVM physical volume):
$ cryptsetup open /dev/sda3 ubuntu-root
$ lvreduce -v --resizefs -L -5G /dev/ubuntu-vg/ubuntu-lv

2. Create an encrypted partition
Let’s set up the HDD LUKS-encrypted partition, making sure that:
- We use the same encryption password as in the root volume (this is optional, but allows us to use the
decrypt_keyctlscript to unlock both partitions with a single password prompt) - The sector size used in the HDD partition matches the one in the SSD (this is mandatory as far as I’m aware, otherwise LVM won’t let us extend the volume group, issuing an error like
Devices have inconsistent logical block sizes)
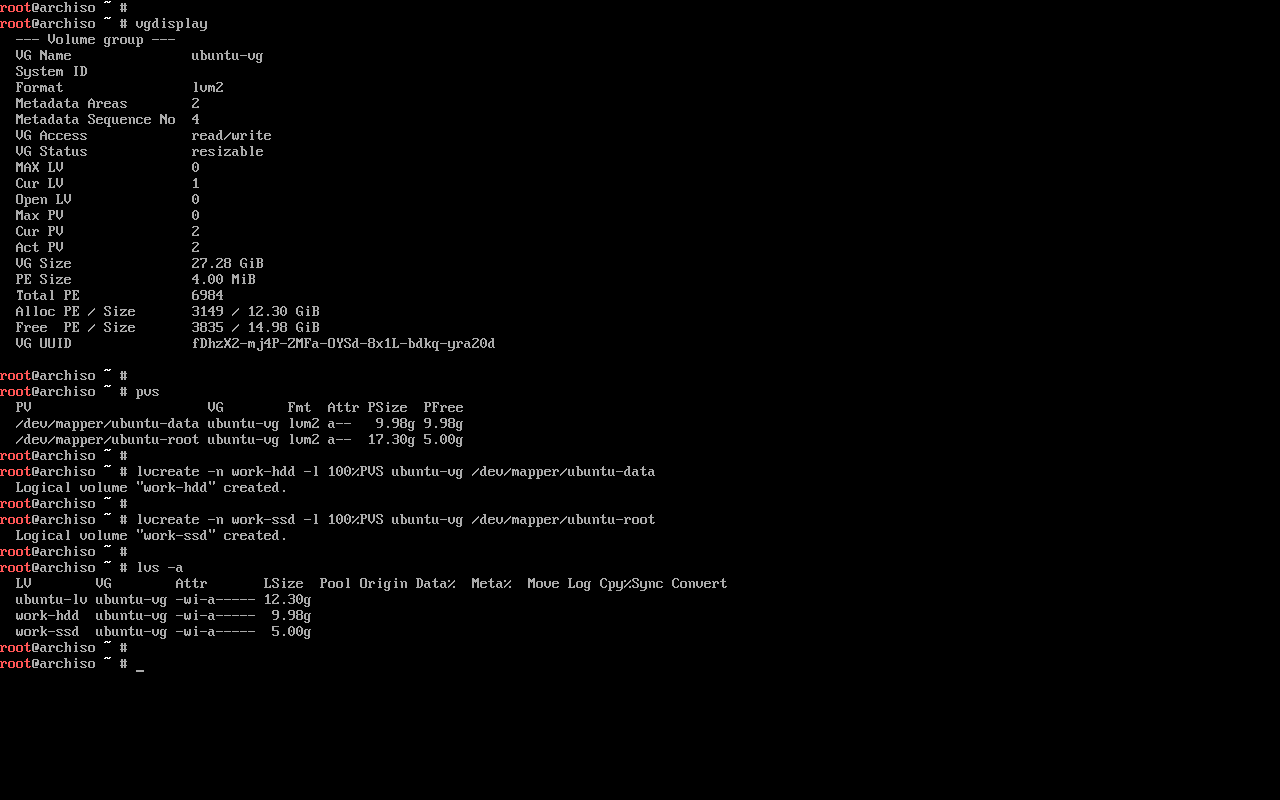
3. Extend LVM volume group
Next, we layer an LVM physical volume on top of the new LUKS partition, then add it to the existing LVM volume group.
$ pvcreate /dev/mapper/ubuntu-data
$ vgextend ubuntu-vg /dev/mapper/ubuntu-data

NOTE: if you need to close a LUKS+LVM partition for any reason, you many need to stop the volume group with vgchange -a n ubuntu-vg before cryptsetup closeing the partition.
4. Set up the lvmcache
In order to create the cache, we’ll need a logical volume in each device:
$ lvcreate -n work-hdd -l 100%PVS ubuntu-vg /dev/mapper/ubuntu-data
$ lvcreate -n work-ssd -l 100%PVS ubuntu-vg /dev/mapper/ubuntu-root
Then, we follow the documentation in order to create the cache as either a --cachepool or a --cachevol (see this StackOverflow question for more information on the choice):
$ lvconvert --type cache --cachepool work-ssd ubuntu-vg/work-hdd
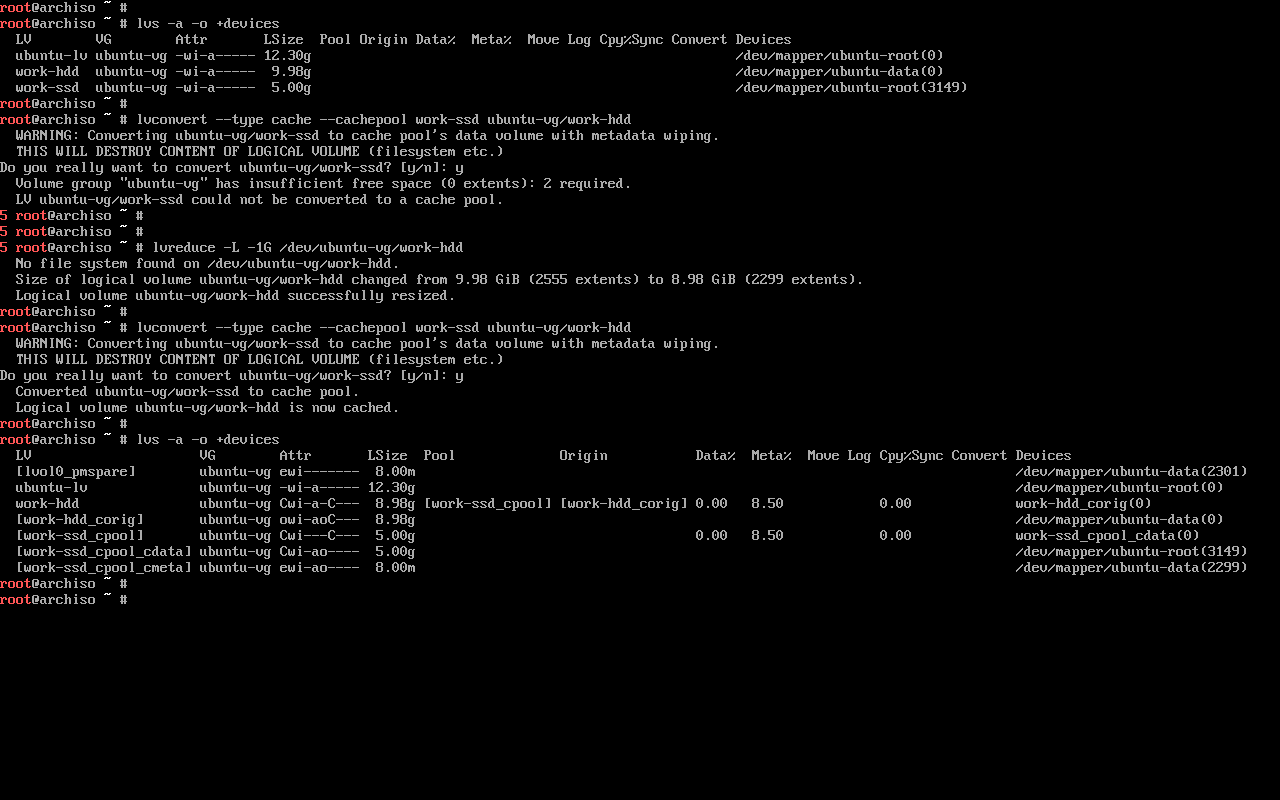
In order to make use of the cache, just use the work-hdd logical volume normally.
For example, this would be a good time to add a filesystem to the cached volume:
$ mkfs.ext4 /dev/ubuntu-vg/work-hdd
5. Reboot to Ubuntu
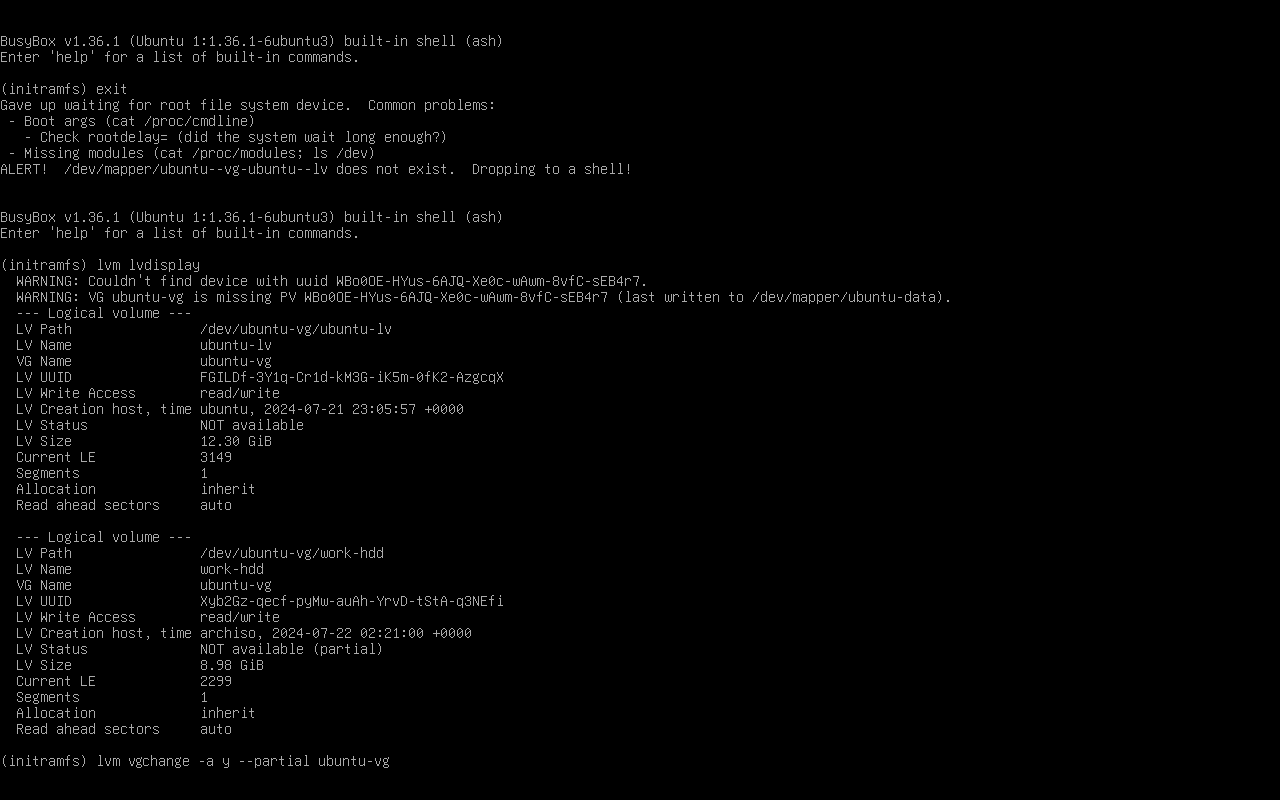
We should now be able to reboot into Ubuntu, albeit with a small hiccup: after entering our decryption password, the boot process may drop into a BusyBox recovery shell.
There’s no need to panic, a first exit command will tip us that the reason for failure is that something went wrong when mounting the root volume.
In this case, that’s because we never told the system that it needed to decrypt the HDD partition, and LVM fails by default when a volume group is incomplete.
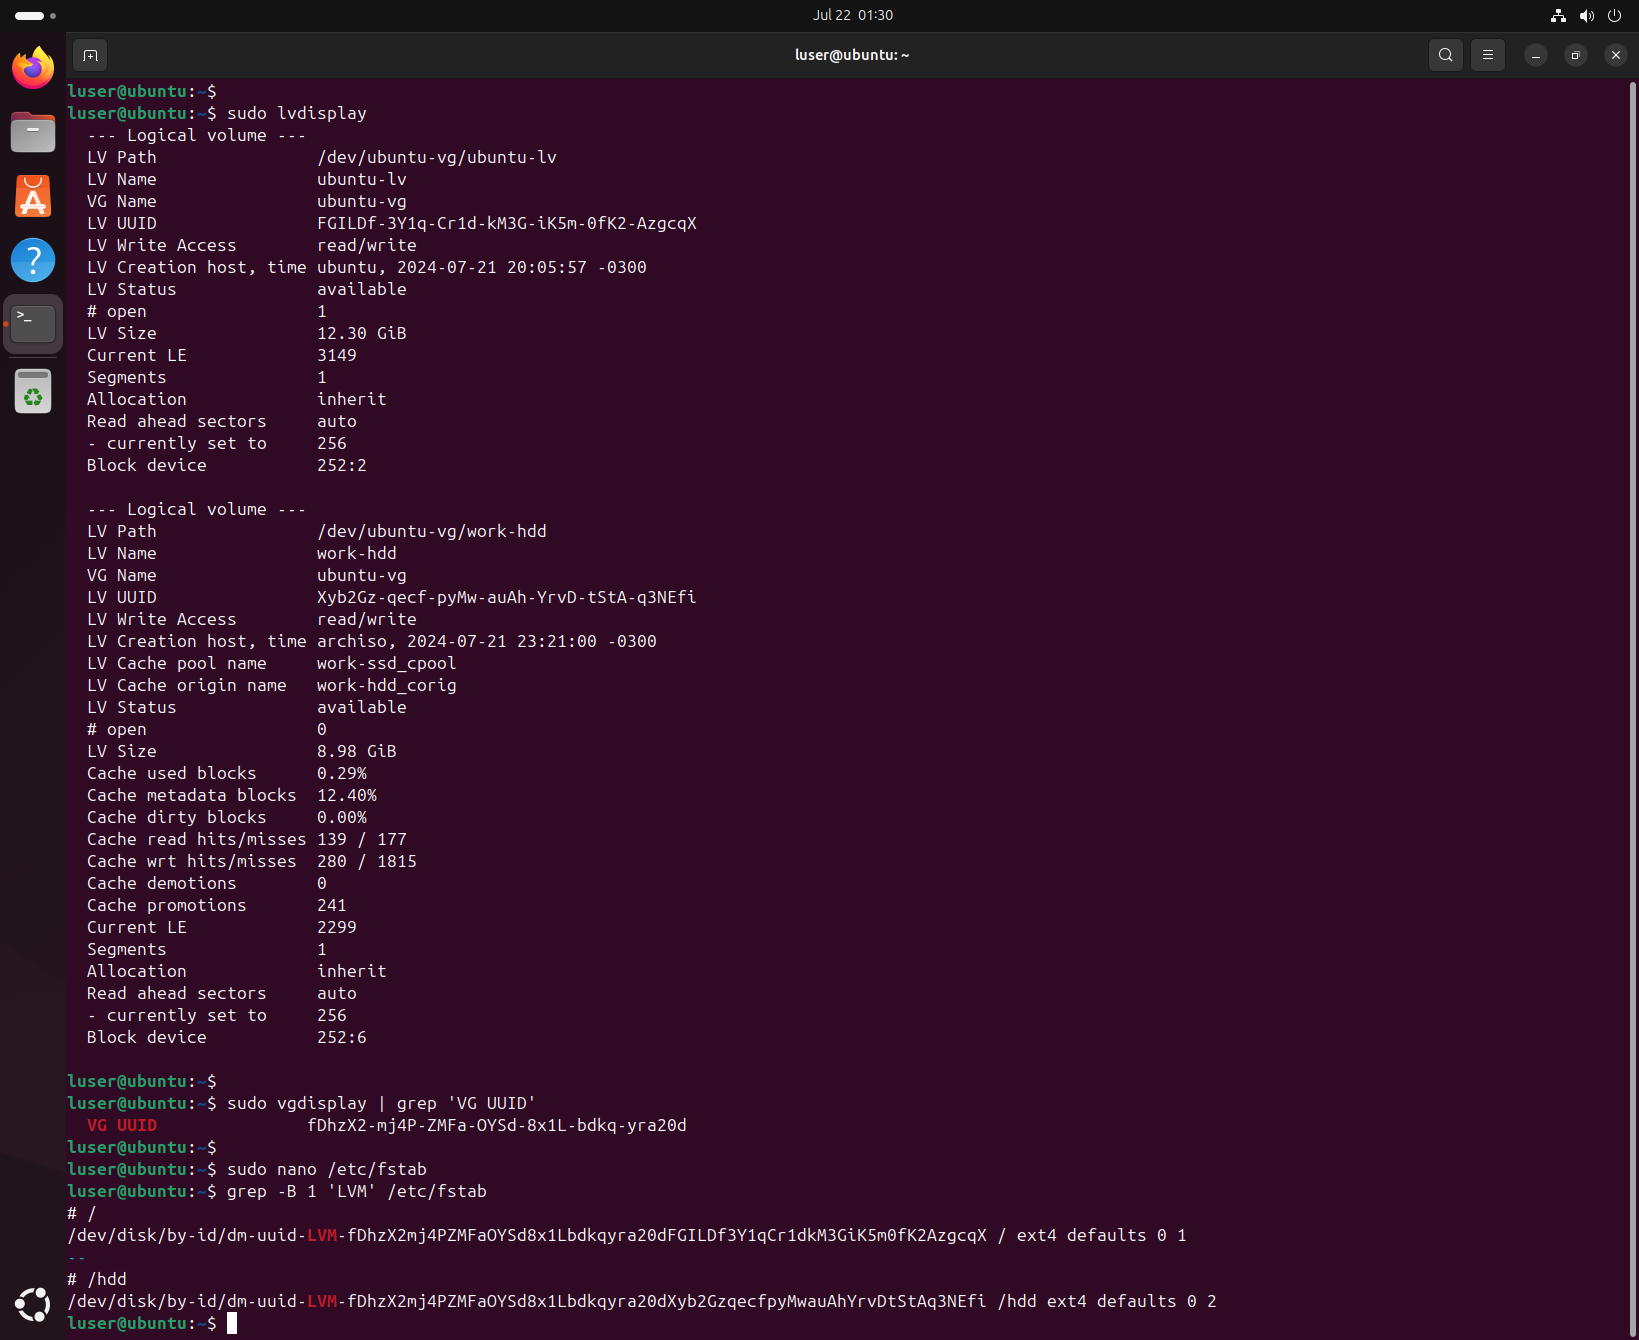
We can run lvm lvdisplay to check that, while the new logical volume is not available, the old one (containing the system root) still is.
Therefore, we just activate the volume group in partial mode with lvm vgchange -a y --partial ubuntu-vg, then exit again to finish the boot process.
6. Setting up decryption
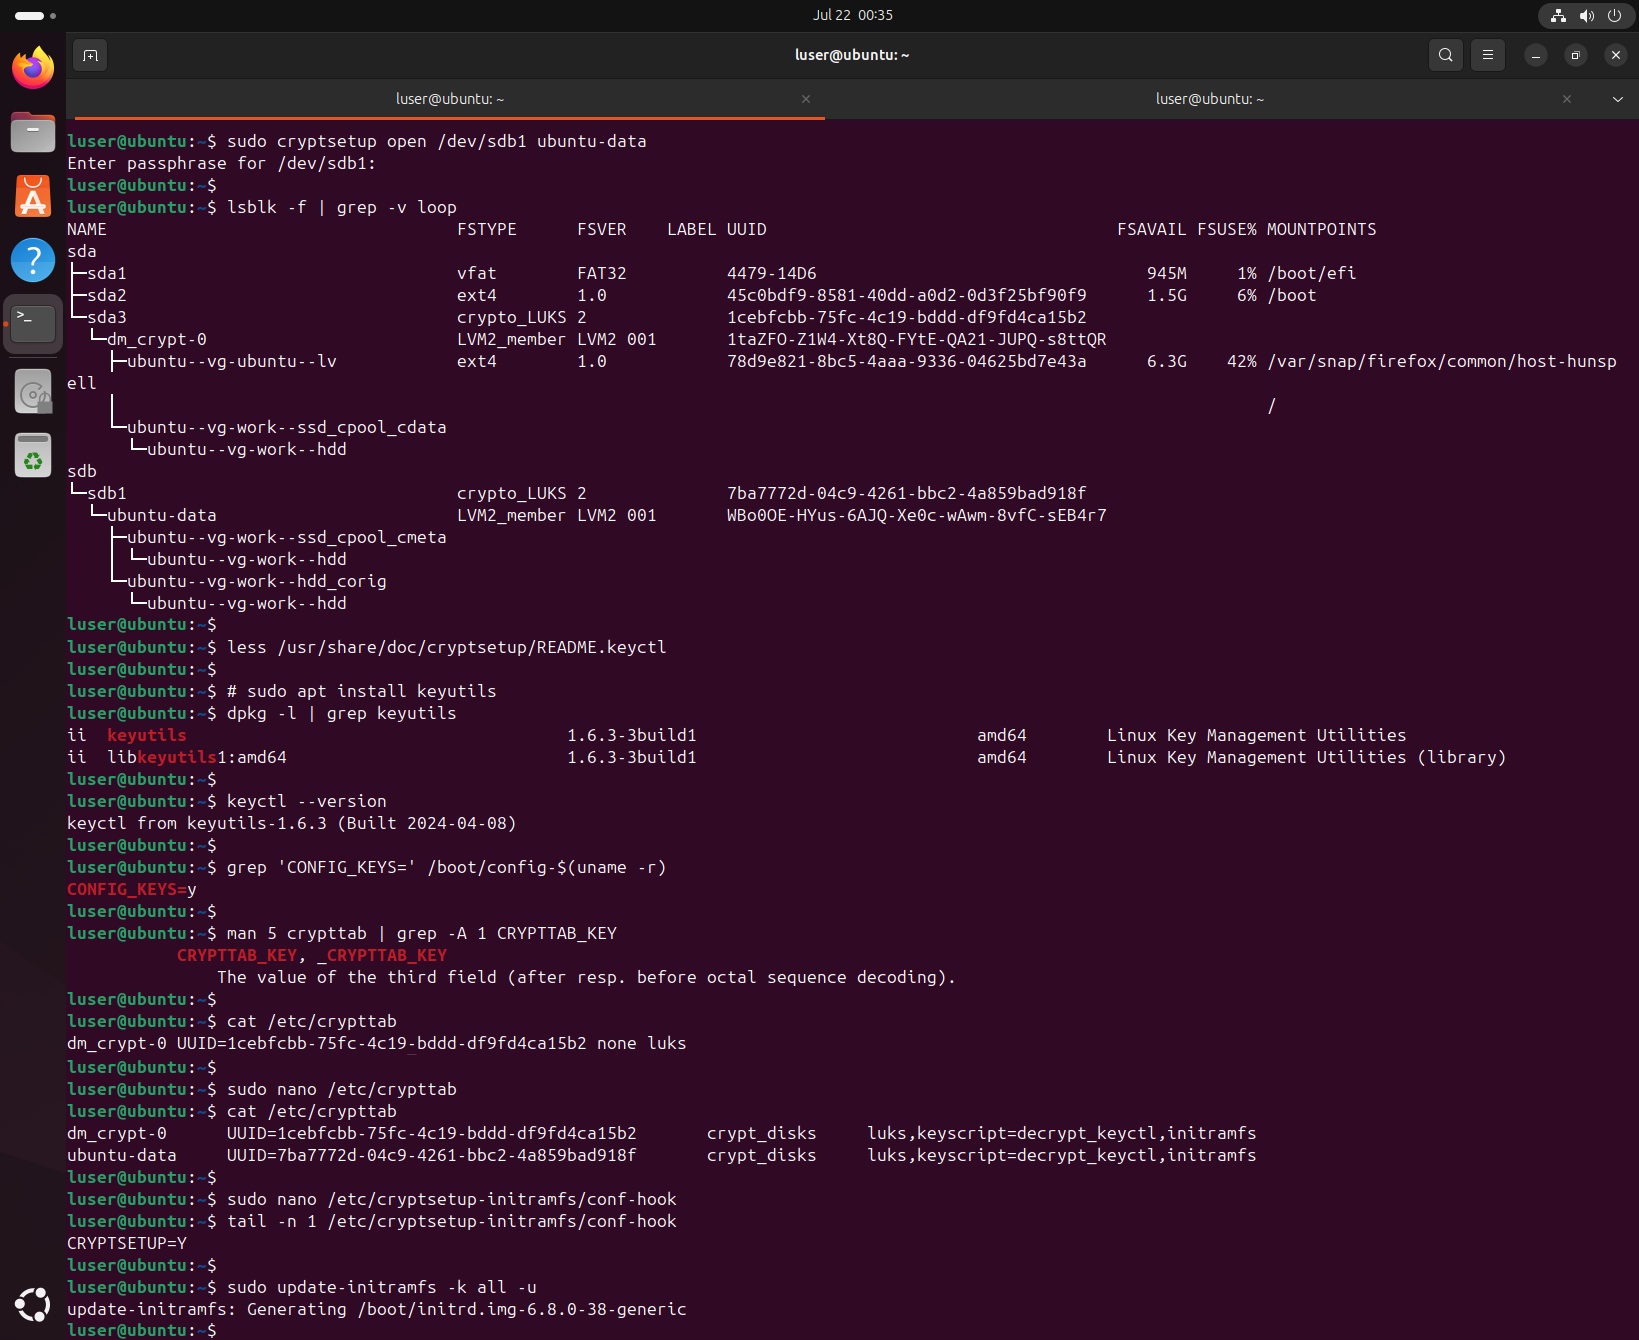
Once the boot process is done, open a terminal to decrypt the remaining partition - the LVM volumes inside should also get recognized automatically.
$ sudo cryptsetup open /dev/sdb1 ubuntu-data
We’ll now set up a script which will cache our decryption password in order to open both of our LUKS partitions during the boot process (more specifically, by the initramfs image which is loaded from the boot partition).
We begin by installing the keyutils package.
Then, edit the /etc/crypttab file in order to add the keyscript option and set up the same CRYPTTAB_KEY for both entries.
We also add the initramfs options and make sure it will be handled there by setting CRYPTSETUP=y in /etc/cryptsetup-initramfs/conf-hook.
Finally, re-generate the initramfs with update-initramfs.
$ sudo apt install keyutils
$ sudo nano /etc/crypttab
$ sudo nano /etc/cryptsetup-initramfs/conf-hook
$ sudo update-initramfs -k all -u
After those steps, we can reboot to check that we’ll no longer drop to a BusyBox recovery shell. Furthermore, from now on, both partitions will be unlocked by a single boot password prompt.
7. Mount the cached partition
Finally, we can set up an entry in /etc/fstab in order to automatically mount our cached partition.
In my case, I’ll create an /hdd folder that’s owned by my main user, but another possibility would be mounting to /home directly (make sure to have backups, if you do).
I should note that, in order to use UUIDs to reference an LVM logical volume in fstab, we need to combine the volume group (VG) UUID and the logical volume (LV) UUID.
We can acquire those with vgdisplay and lvdisplay, respectively, then remove the hyphens and concatenate them to get the full LVM device mapper UUID path.
In the end, we have most of the system stored in the faster SSD, while our user data can stay in the bigger (but slower) HDD - both devices using LUKS encryption. The LVM subsystem will then take care of moving frequently accessed HDD data into the SSD cache - automatically improving performance for the data that’s actually being used. Victory!