How to install Ubuntu 24.04 LTS with Full Disk Encryption
Ubuntu 24.04 LTS, code name “Noble Numbat”, was released just 3 weeks ago. The new installer doesn’t make it obvious, but you can have an encrypted install without erasing / using the entire disk. Here’s how to do it.
1. Acquire installation media
- Download the official ISO image;
- Make sure its
sha256summatches the expected hash (81fae9cc21e2b1e3a9a4526c7dad3131b668e346c580702235ad4d02645d9455for 24.04); - Flash the image on a USB stick;
2. Prepare the target system
- Back up your data;
- Boot your computer from the live USB;
- Close the installer in order to see the system’s desktop;
- Delete or shrink existing partitions in order to make space for Ubuntu:
- In simple setups, this can be done using GParted or
fdisk - More advanced setups require extra steps (e.g; resizing encrypted partitions is tricky)
- In simple setups, this can be done using GParted or
- Consider using a secure erasing process in case your drive wasn’t encrypted before;
- If there’s any disk space you DON’T WANT Ubuntu to occupy, just make sure the installer doesn’t see it as free space by creating dummy partitions there;
Partition layout
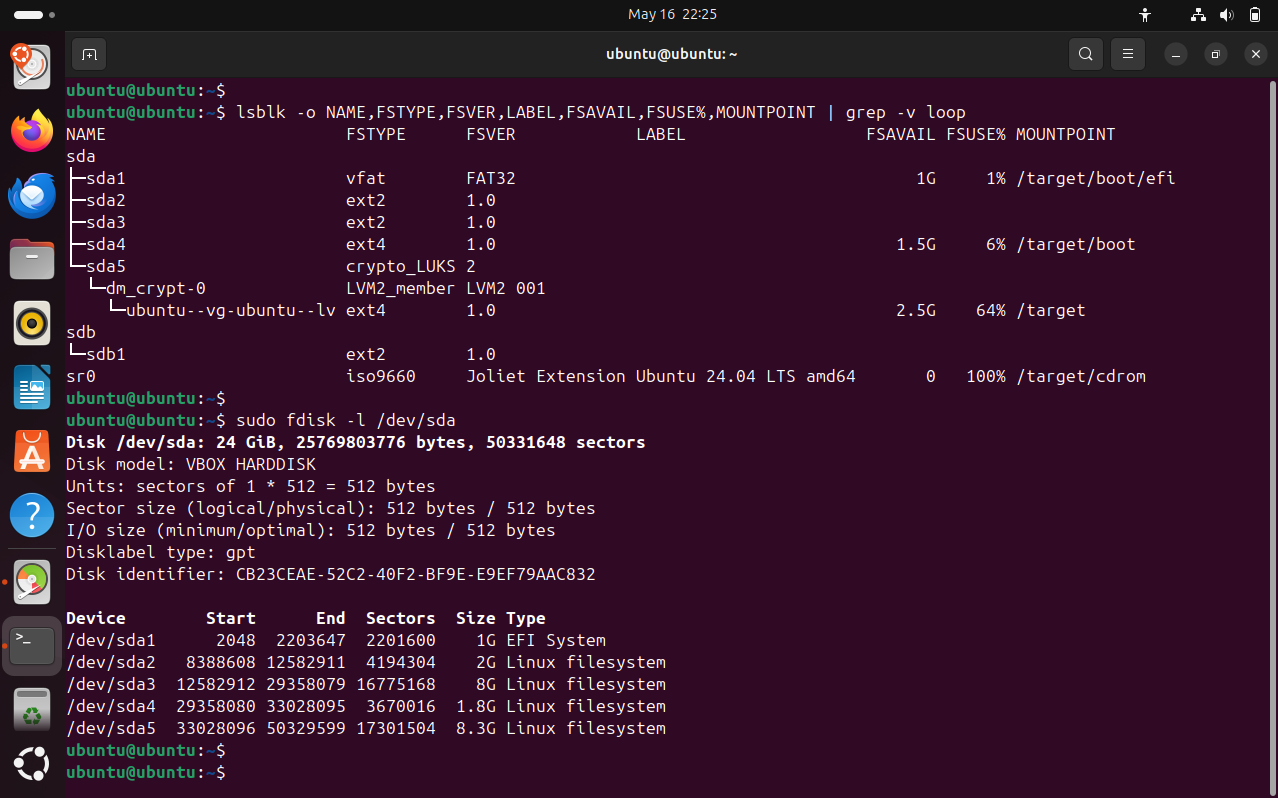
Based on my VM tests, here’s how the automated installer lays out partitions:
- If an ESP partition already exists, it will be used by Ubuntu as well;
- Otherwise, a new one is created in the first sector range of the disk with enough free space for it (default size appears to be 1075 MiB);
- Then, it chooses another disk chunk to set up a boot partition and a root partition:
- I’m not sure whether it uses the first free range which can fit the OS, or the biggest such range that it can find;
- Either way, the two partitions are laid out one after the other; where the first 1792 MiB are used by the boot partition and everything else is given to the root partition.
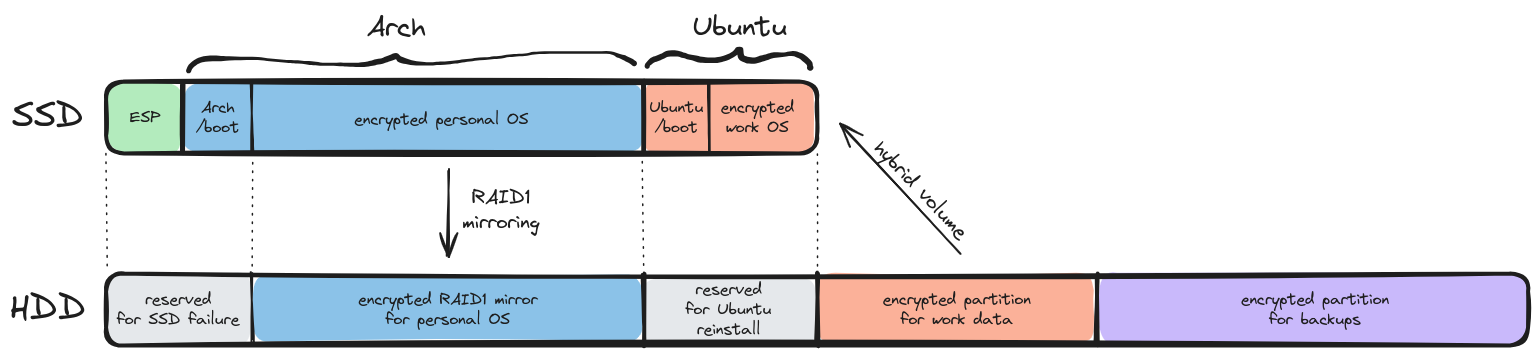
In my case, I’ve carved out the first 4 GiB and the last 10 GiB as free space. The remaining disk space between those was reserved by two partitions which I’ll use to install Arch afterwards.
3. Guided encrypted install
- Re-open the installer and follow the wizard until you get to the disk setup page:
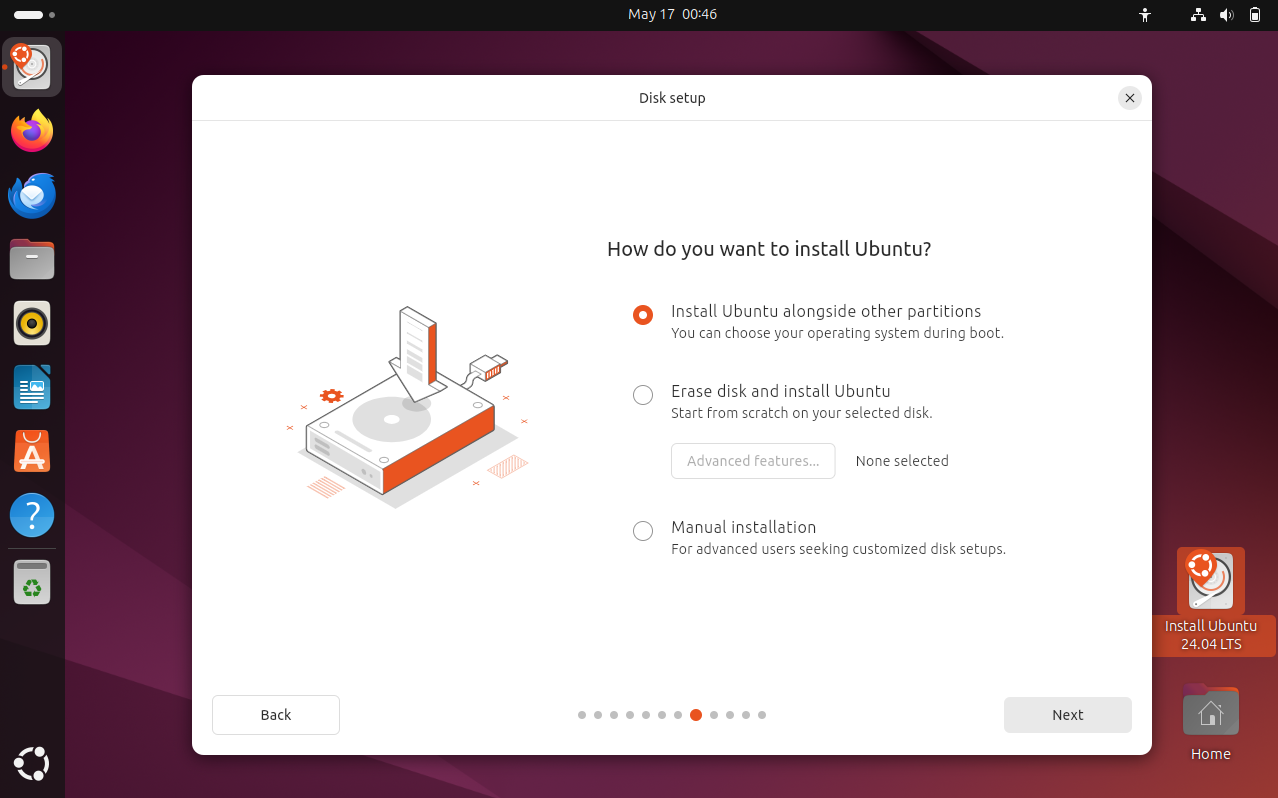
- Toggle the “Erase disk” option, just for now;
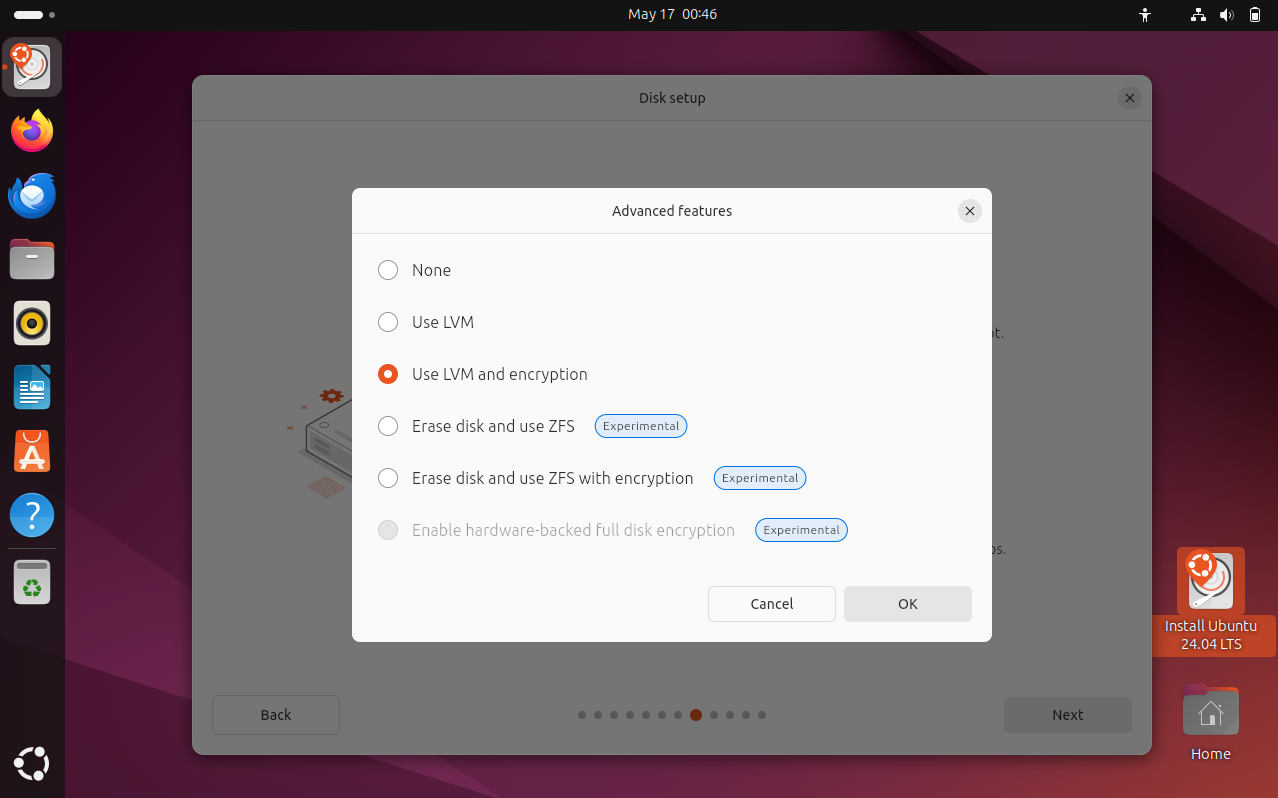
- Go to the “Advanced features” menu and select “Use LVM and encryption”;
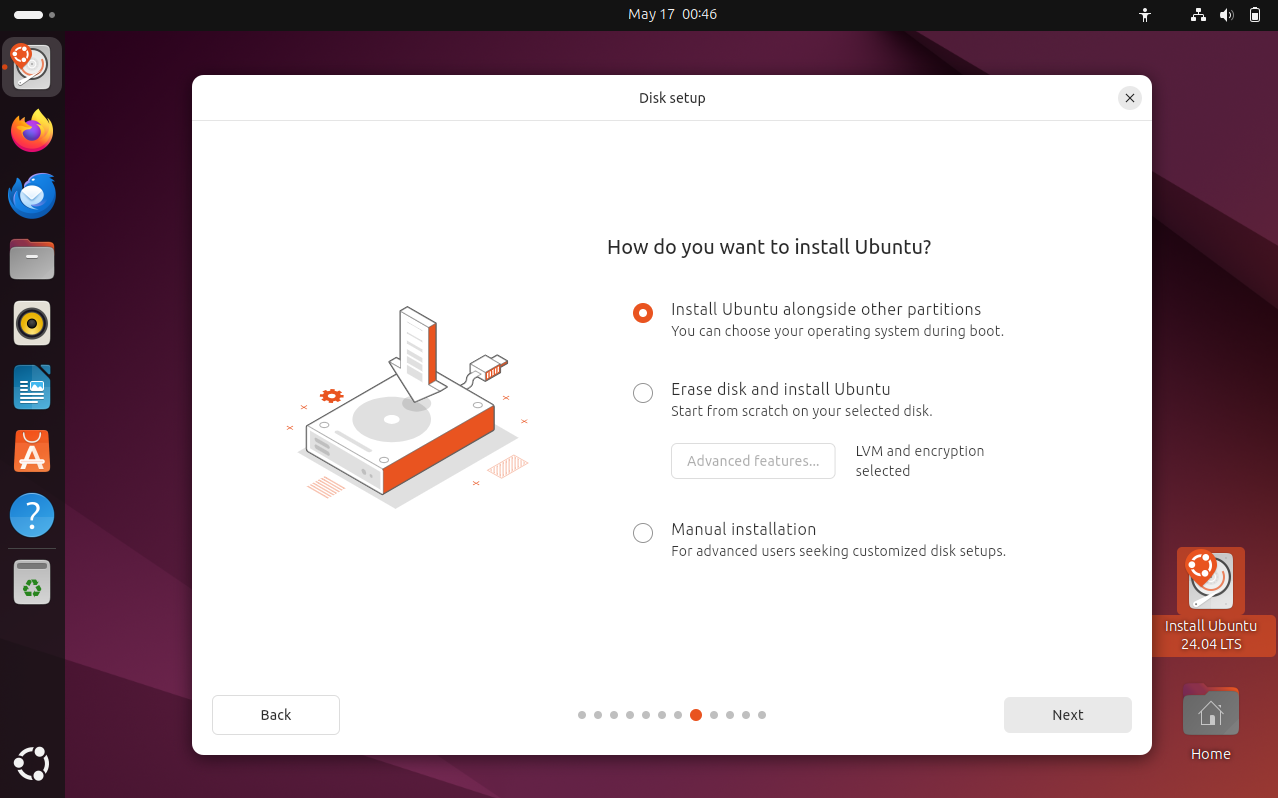
- If you don’t want to erase the entire disk, make sure to toggle the “Install Ubuntu alongside other partitions” option before continuing;
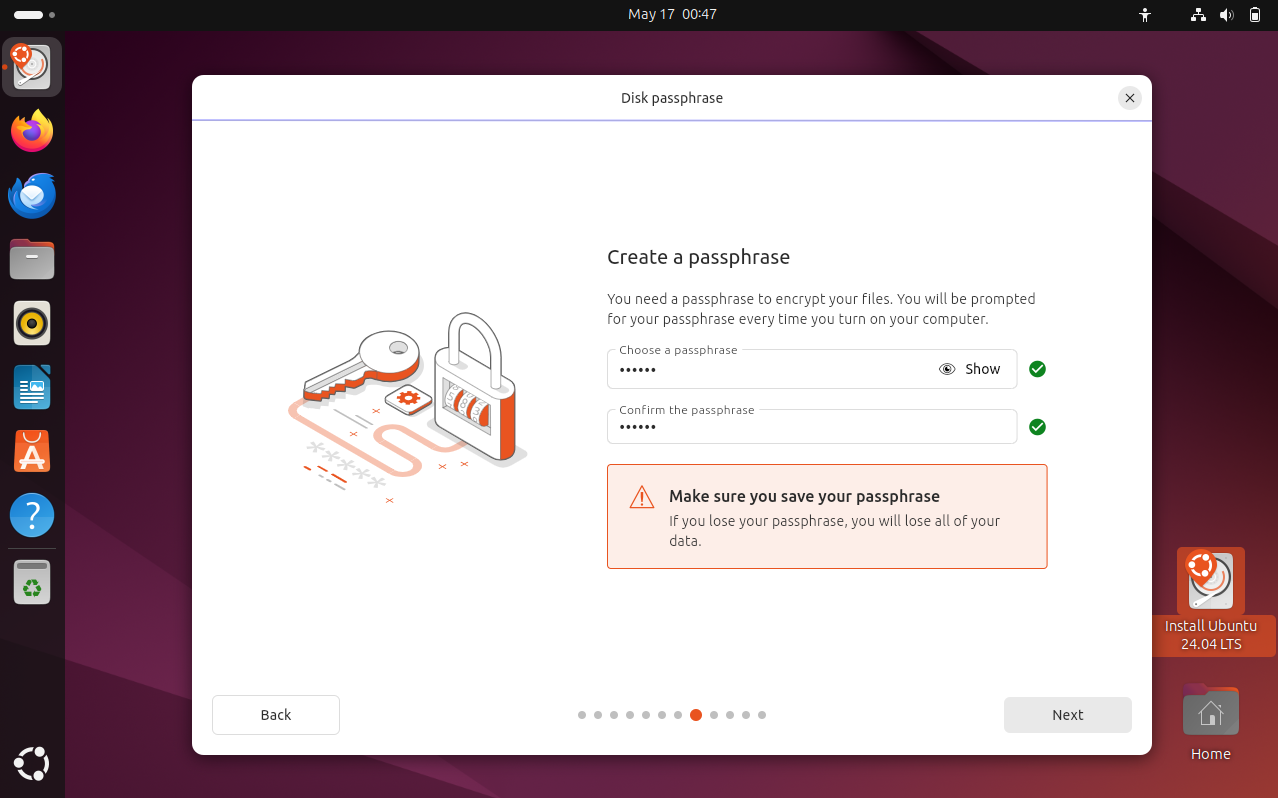
- If encryption was indeed enabled, you’ll be prompted for a password in the next page:
- Keep following the install wizard until it asks you to review your choices;
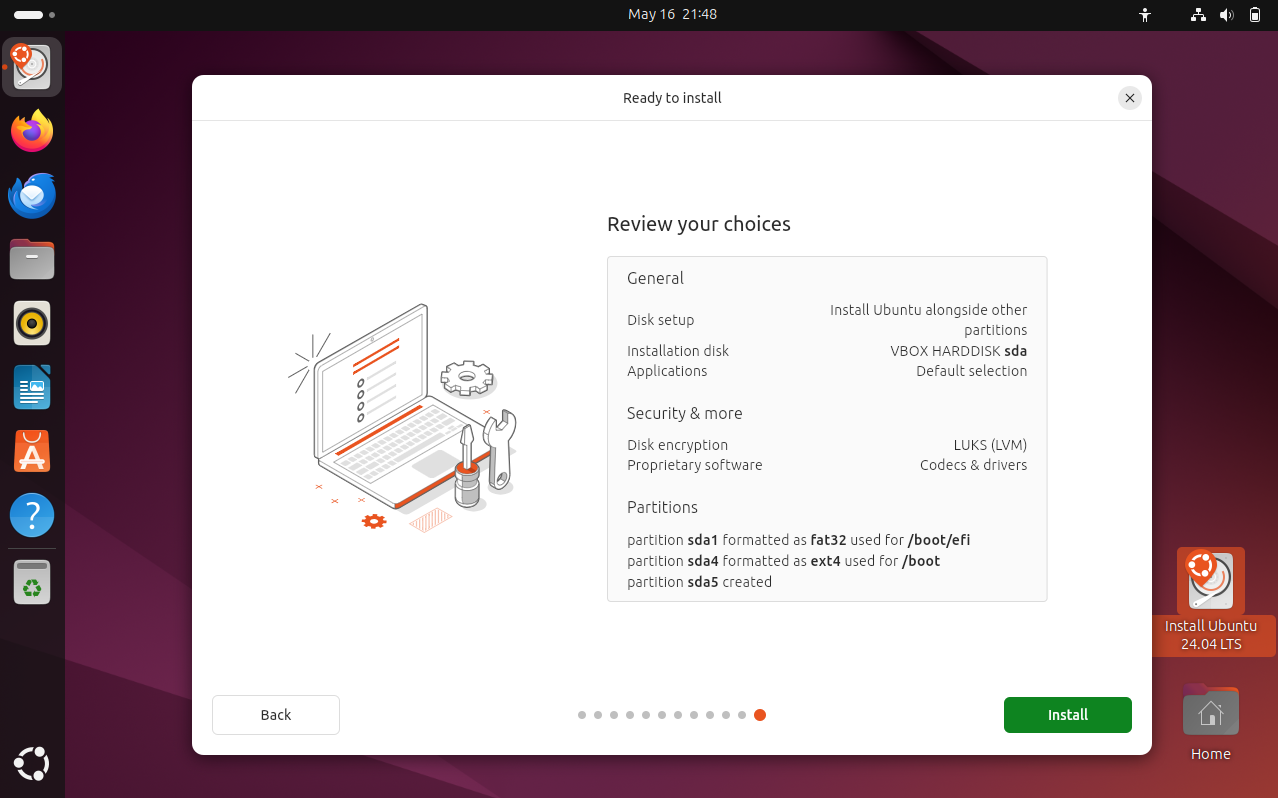
- After confirming that everything is as expected, let the installer do its thing;
4. Reboot
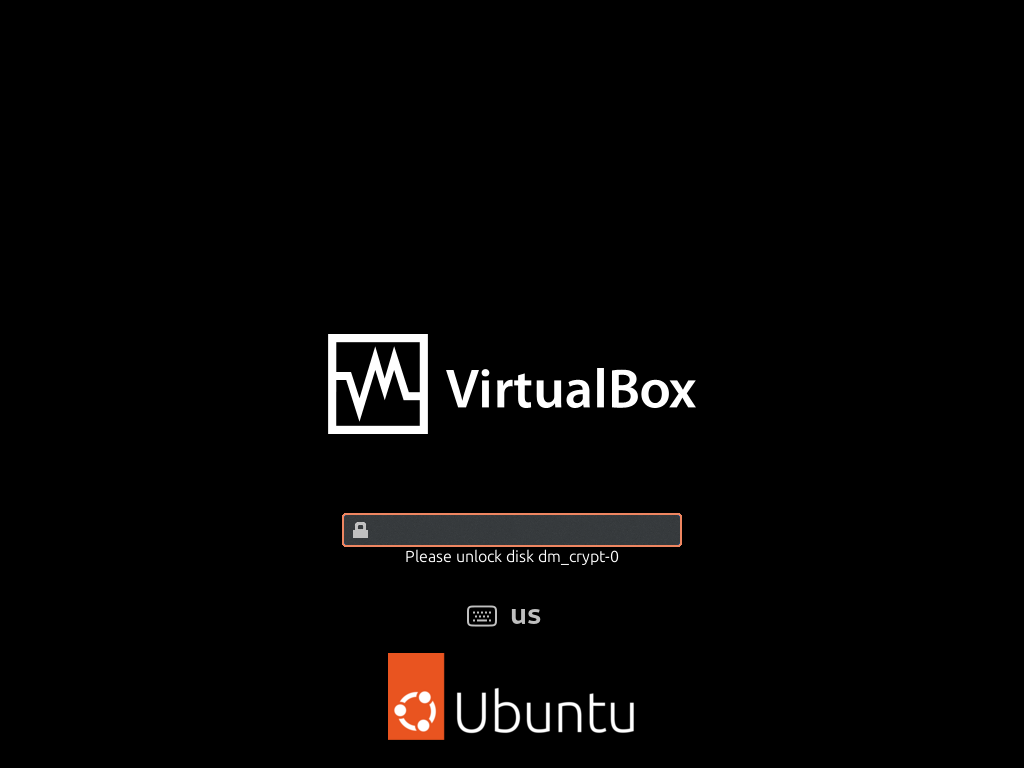
- When rebooting into your fresh Ubuntu installation (and on every boot from now on), you’ll be asked for the encryption password used during installation:
Appendix - How to fix installation failure on a VM with low memory
If the installation doesn’t finish successfully (and you’re testing it in a VM):
- Take a look at this bug report
- Increase the amount of memory assigned to the VM
- (I got this error when using 4 GiB, but 8 GiB worked fine)